How To Use Remix IDE Beginner To Master Level
In this article you’ll learn the following:
- What is ethereum remix IDE
- How to use ethereum remix IDE to write smart contract.
- How to deploy your smart contract on testnet and mainnet.
- Useful plug-ins and their applications.
The first thing that springs to mind when thinking of building smart contracts for the ethereum network, binance smartchain network, or celo network is the ethereum remix integrated development environment.
What is Ethereum Remix IDE ?
Ethereum Remix IDE is an integrated development environment that allows smart contract developers to build, compile, and deploy their smart contracts on any supported network using an inbuilt debugger. It’s a web and desktop program that’s free to use. It allows for quick development and includes a collection of plugins with graphical user interfaces.
How can I develop smart contracts using the Ethereum Remix IDE?
Remix IDE also has an online version, which you may access by going to remix.ethereum.org. Go to https://github.com/ethereum/remix-desktop/releases/ to get the desktop version. Then select the one that works with your machine. In this article, we’ll be using the remix IDE’s web version.
Now it’s time to get down to business. I presume you have your remix IDE open in your browser; you’ll see a basic tutorial for what the IDE does; simply follow the steps until you reach a screen that looks like the one below.

now click on the file icon to add a new file giving it file extension ‘.sol.’ and hit enter. it looks like the below image.

Now to write your first smart contract you need to :
- Define SPDX-Licence
- Pragma solidity(version)
- Contract name
The above mentioned are very important components of a smart contract. In this article we won’t be writing much solidity code; so a simple code that accepts and store phone number is what we will be using.

How to deploy your smart contract on testate and main net ?
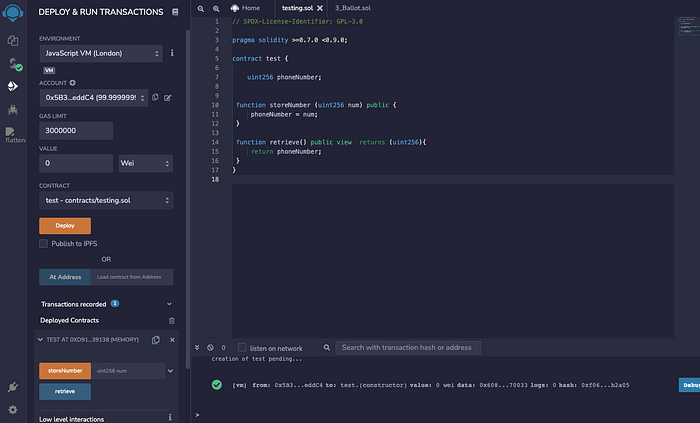
After you’ve developed your smart contract, you’ll need to compile it to see whether it has any errors; if it does, it won’t be compiled properly and hence won’t be deployed. The compilation interface looks like this; simply click the compile button to compile your contract and wait for the results. If the compilation finishes with a green ticker, it was successful, and you can continue on to the next process, which is deployment.

Now to deploy after successful compilation you simply click on the deploy icon and click deploy
To deploy on the test net or main net of ethereum network or binance network; simply navigate to ‘Environment’ on the top right corner in the deployment tab, change it from javascript VM to injected web3, click deploy and it will request you connect your wallet
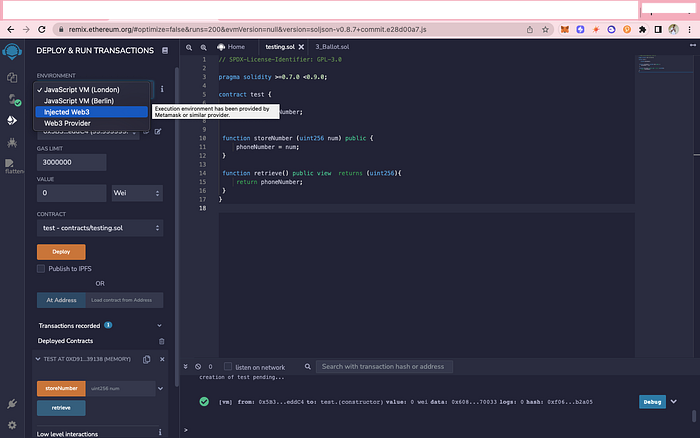
connect your meta mask wallet and click deploy.
Useful Plug-in and their applications

This integrated environment consist of pretty awesome plug-ins; to check them, navigate to more and click it; it will show the list of available plug-in, if you find anyone useful you can activate it by simply clicking on activate. few lists of available plug-in are :
Flattener :Flattens compiled smart contracts.
Dgit: Manage workspaces in a git repository.
Celo: Deploy and Run Transactions with Celo.
Contract Deployer: Deploy a compiled contract to the same address on multiple networks
and many more…
Thanks for taking your time to read this article.